Route Assist Container Inventory |
Managing Containers on the tablet has been re-designed in Route Assist version 7.19.0001 to streamline the process of moving containers. The new design consists of one screen which shows the status of all bins for the current call, on the site, truck and at the yard. The same screen will be presented to the user any time they need to interact with containers. See the Summary_of_Changes_in_Route_Assist_version_7.19.0001 as well as detail steps for each of the new features; Bins in Call Details, Bins Button, The Container Screen and Setting GPS Coordinates.
Also see Route Assist Container Inventory Tutorial and Related Topics.
Summary of Changes in Route Assist version 7.19.0001

- Containers are now color coded to reflect their current GPS status.
- Bin GPS button has been removed.
- A single Bins button replaces the former Load and Unload buttons.
- Bin GPS functionality is performed within the updated Container Screen and the Done button when the call is finished by the driver.
Containers are now color coded to reflect their current GPS status.
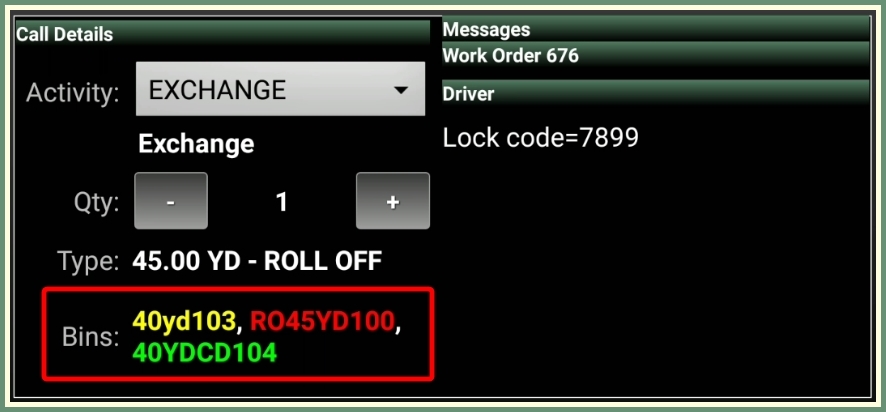
Red: There is no GPS location for this bin.
Yellow: This bin has a GPS reading but not on the current call.
Green: The GPS location has been set for the bin on the current call.
The list of Bins in the Call Details view will be automatically updated to reflect the container action the driver has performed on the current call.
Example: If the driver clicks the Bins button and moves Bin 40C201 to the Truck, then Bin 40C201 will no longer be visible in the Bins list in Call Details once the container action is saved.

The Bins button now displays the container actions to be performed for the current call as well as a count of bins where GPS values have been set on the current call.
Bins with No Container Action

- The bins button will only show the bin GPS status.
- The first number is the number of containers where the GPS value has been set on the current call.
- The second number is the number of containers where the GPS value can be set.
GPS Only Mode: When the container form is opened when no container action exists for the activity selected, the container screen will be set to GPS Only Mode where the only function the user can perform is to set the GPS coordinates. The Yards do not load since this process can use data which can take a while to complete and cause a delay.
Bins With Container Action

- The activity for the container action on the call will be displayed within the Bins button.
- The first number beside the activity is the number of that action that has been performed.
- The second number beside the activity is the number of that action that should be performed.
Notes:
- In the case of a Swap or Exchange activity, both the Assign and Unassign actions must be performed in order to register a 1.
- If for example there are 2 Swap activities on a call; 2 assigns and 1 unassign has been performed, the activity will only show as 1 Swap until the second Unassign has been performed.
The driver can set the container GPS by clicking the GPS icon to the left of the container description in the Site column. This icon can be red, green or yellow depending on the current GPS status of that bin. The coordinates can be set any number of times on the same call.
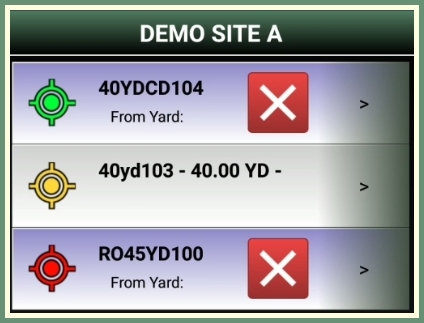
- Click the Bins button.
- The GPS icon color will be displayed according to the current .
- If the container is already listed in the Site column, click the GPS icon to set the current GPS location.
- If the container is on the truck, click the left arrow and move the container to the Site column and click the GPS icon to set the current GPS location.
- Click Save.
Bins GPS Functionality
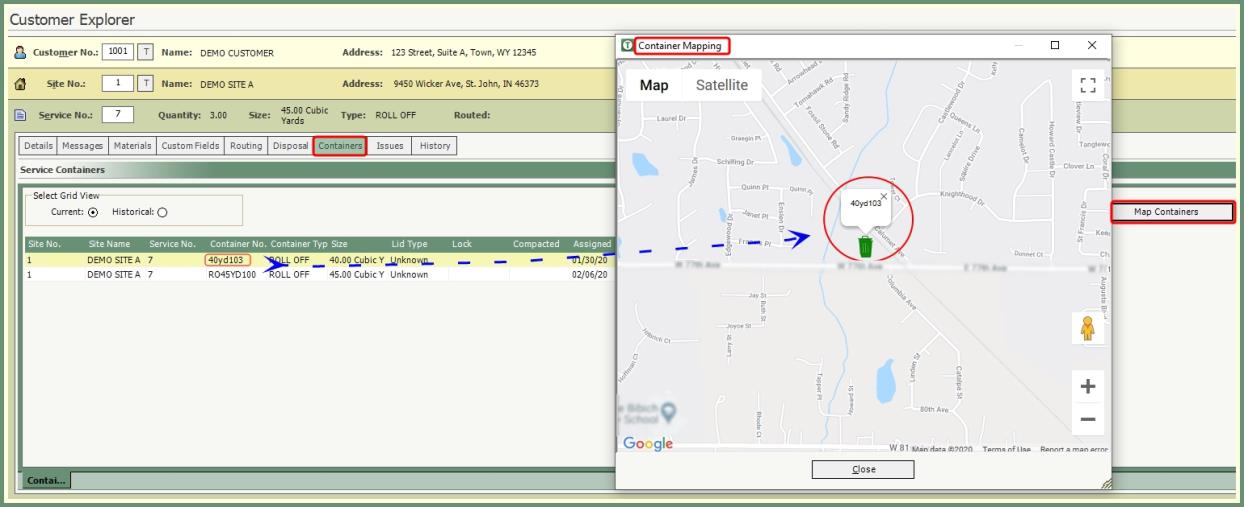
When a GPS exists on a container and the driver presses Done on the call, the container mapping in Haul-It will be updated with the current container location.
From within the Bins button, when an activity with a container action is selected, the driver will be able to move bins freely between the Site, Truck and Yard as well as set the GPS location and view where the container was moved From.
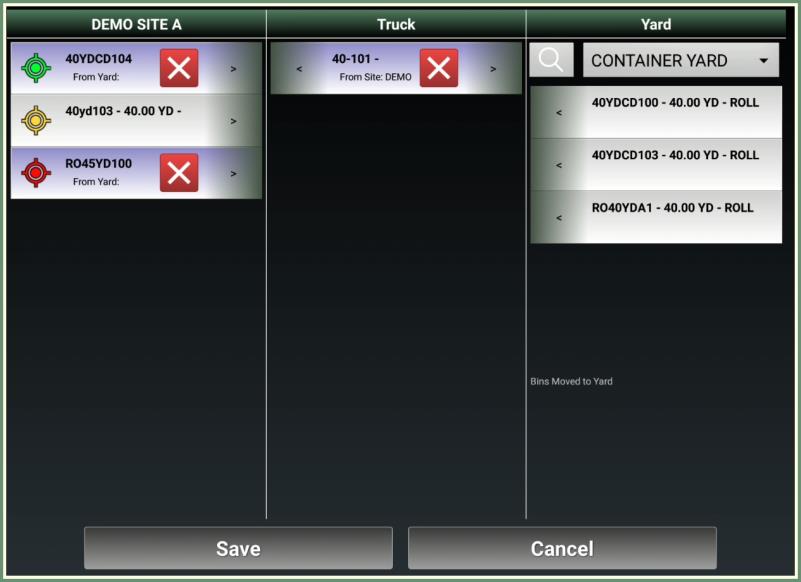
- Click the Bins button.
- Current container status will appear in the Container Screen.
- Click the Yard drop down to change the Yard.
- From will appear below the container description and indicate where the container was originally moved From. (From Yard, From Site + Site Name, etc...).
- >: A right arrow button will appear on containers listed in the Site and Truck columns. Click to right arrow to move the bin one column to the right.
- <: A left arrow button will appear on containers listed in the Yard and Truck columns. Click the left arrow to move the bin one column to the left.
- Both a left and right button will appear on containers listed in the Truck column as the container could possibly be moved to either the Site or Yard.
- Click the X button to cancel the move and return the container to it's original location.
- Example: A container moved from the Site to Truck to Yard and the drive clicks X. The container will be moved back to the Site as this was the original location.
- Click Save when finished.
Moving Bins to the Yard
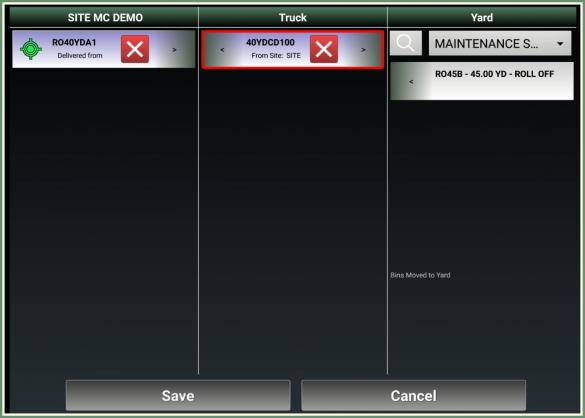
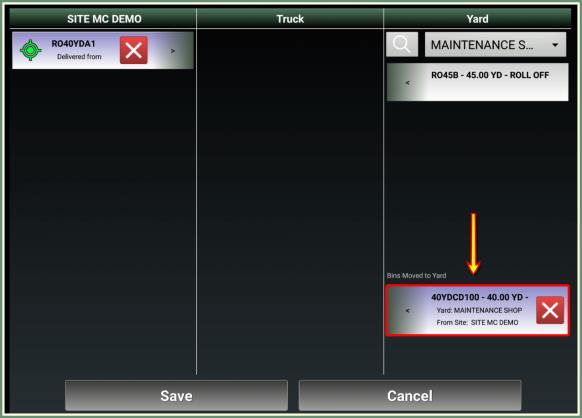
Bins will be moved from the Truck to the Yard selected in the Yard combo box.
- Click the Bins button.
- Verify the Yard displayed in the Yard column. Click the drop down to change the Yard if needed.
- Click the right arrow on the container in the Truck column to move it to the Yard column.
- The bin will appear in the Yard column below Bins Moved to Yard.
- Click Save.
Searching for Bins
Bins within the current selected Yard can be searched by clicking the search button.

- Select the Yard to be searched and click the search button.
- All containers available for the selected Yard will be listed.
- Enter the specific container in the search banner or select a container from the list.
- The container will be moved to the Truck.
- Move the call to the Site if the call has been started.
- Set the GPS status on the Site.
Load Bins Before Route Begins
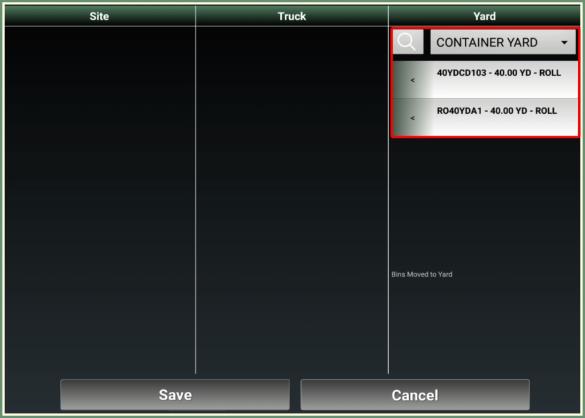
When prompted to load bins on the truck before the route begins, the container screen will only present the option to load bins from the Yard.
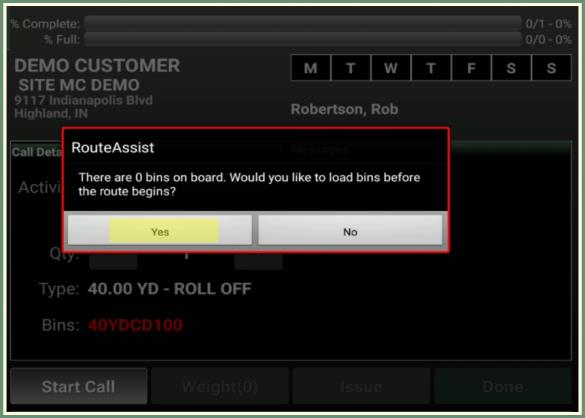
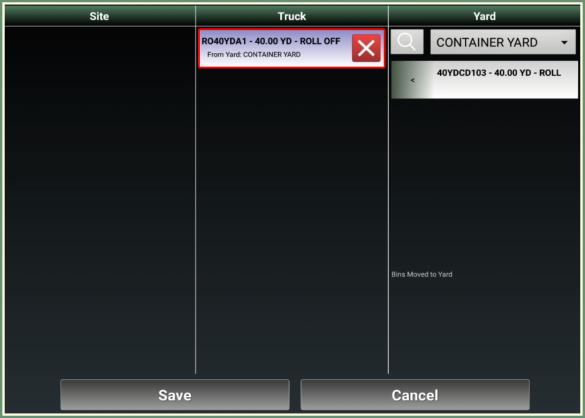
- Driver logs into a route with a container action.
- Click Start.
- Click Yes when prompted to load bins on board before the route begins.
- Click Bins button.
- Select a bin from a yard or search and select a bin.
- Click the left arrow on the bin to be loaded on the Truck.
- The bin will be moved to the Truck column.
- To cancel, click the X on the container and the container will be returned to the Yard.
- Click Save.
Unloading Bins at Logoff
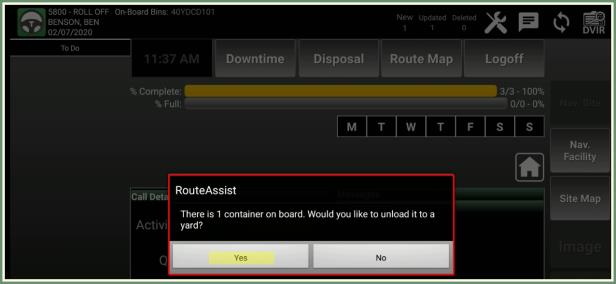
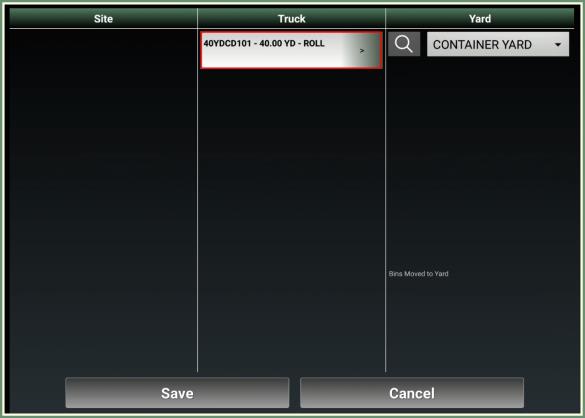
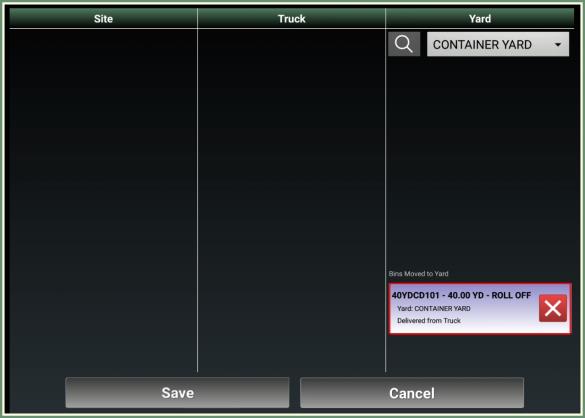
When the driver selects Logoff when a container is on board, the prompt will be received to unload bins to a yard. The container screen will only display the option to move bins from the Truck to the Yard.
|
|
|
- Driver clicks Logoff.
- When a container is on board, a prompt will be sent to unload the container to a yard. Click Yes.
- Select the Yard to move the container to.
- Click the right arrow button on the container to move from the Truck to a Yard.
- The container will be moved to the Yard column below the Bins Moved to Yard.
- To cancel, click the X on the container and the container will be returned to the Truck.
- Click Save.
Next Call
The next call with an Assign action will automatically load the Bins from the Truck to the Site and display within the Call Details.
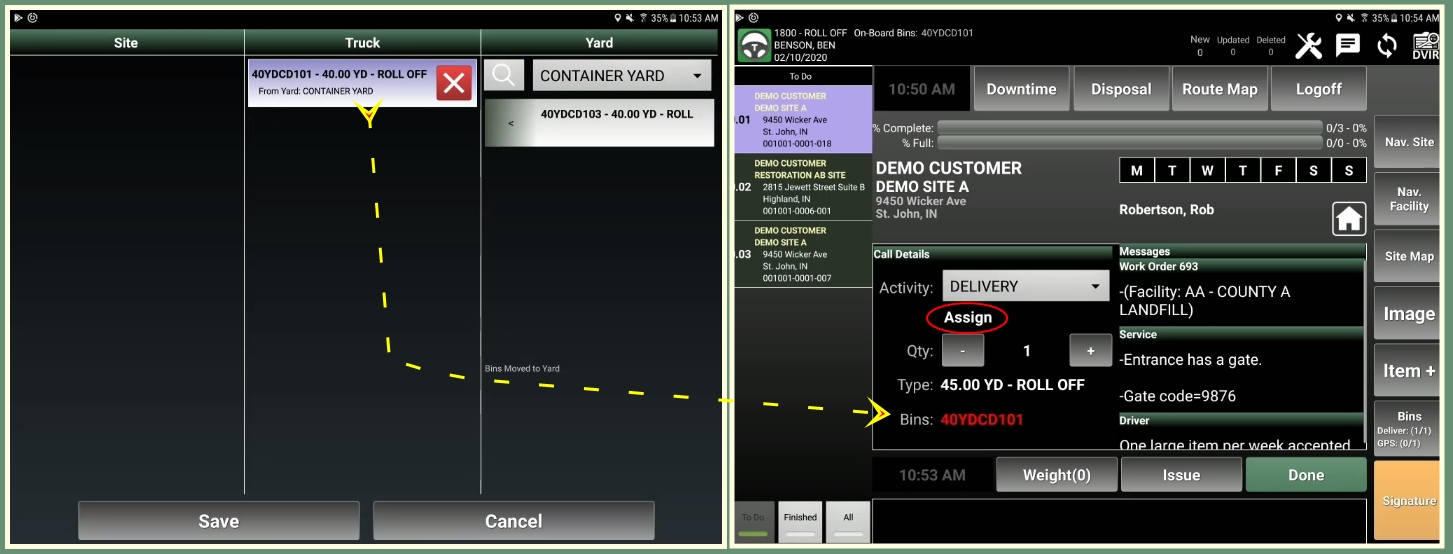
- Click the Bins button to review the current container assignment.
- Click the GPS icon to update the GPS status.
- Move the container from Site to Truck, etc. to remove the container from the Site if needed.
