Route Model Setup
Prior to utilizing Route Model Manager, settings for Route Modeling will define the route optimization process to be used when exporting, importing and real time batch jobs.
Navigate to: System>Administration>Company Settings>Routing>Route Modeling Settings
Route Optimization
Route Optimization will allow for the setup of export, import and save folders used in the Batch Route Process.
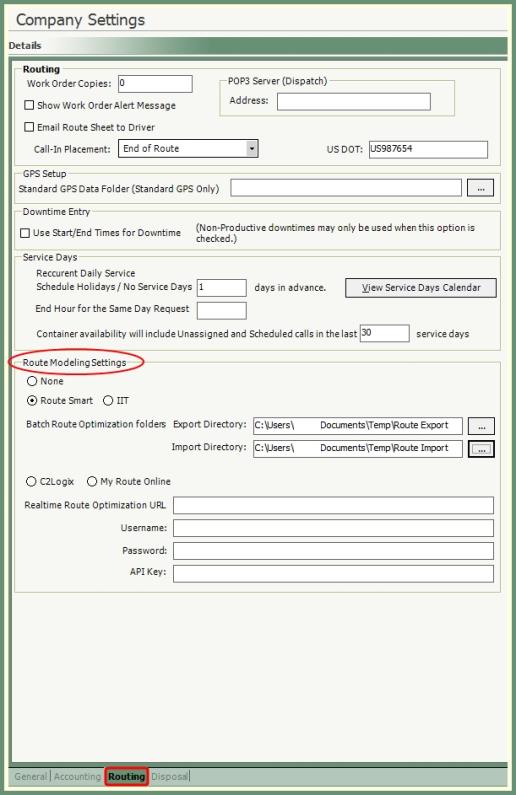
Select Route Modeling Settings
None: Users will manually resequence the stops on the routes.
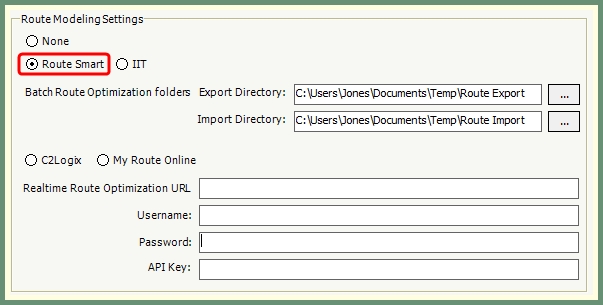
Route Smart: User can send the re-routing job in file format to third parties (Route Smart or IIT).
- Batch Route Optimization folders Export & Import Directories will become available.
- Enter or navigate to the Export & Import folders.
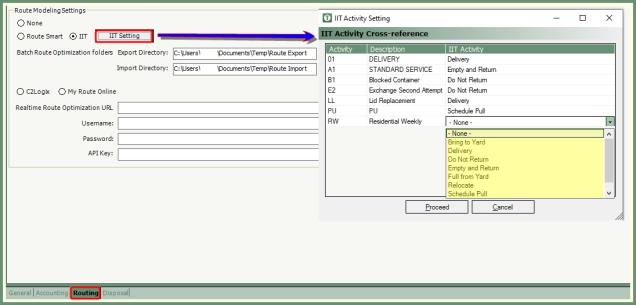
IIT: Users can setup IIT activity cross reference with TRUX activity codes.
- Batch Route Optimization folders Export & Import Directories will become available.
- Enter or navigate to the Export & Import folders.
- Current TRUX Activities will populate the Activity and Description columns.
- IIT Activity column will allow for a drop down list to select the corresponding cross reference IIT Activity to TRUX Activity codes.
- Click Proceed.
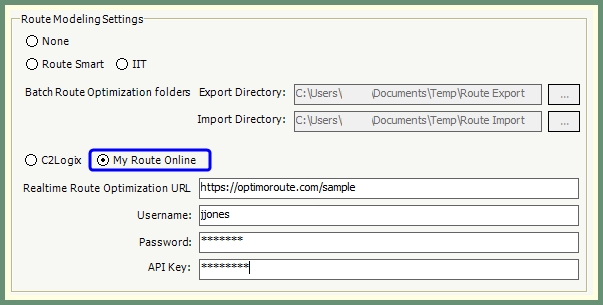
Realtime Route Optimization
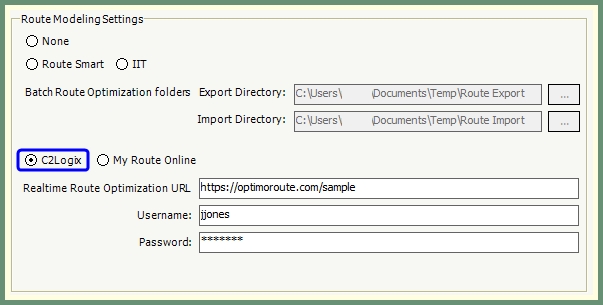
Users can send the re-routing job dynamically to third parties (C2Logix or My Route Online) and expect the result in minutes.
C2Logix: Realtime Route Optimization URL, Username and Password fields will need to be populated for real time process.
My Route Online: Realtime Route Optimization URL, Username, Password and API Key fields will need to be populated for real time process.
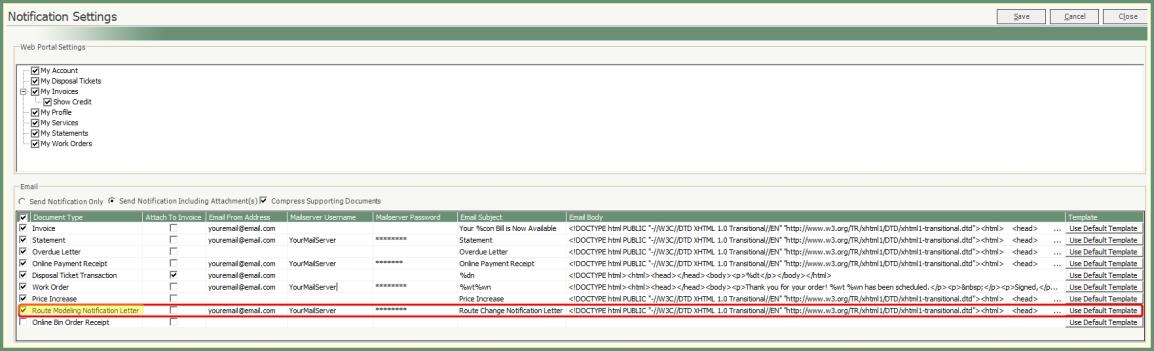
Navigate To: System>Notification Settings
- Enable Route Modeling Notification Letter.
- Enter Email From Address, Mailserver Info.
- Click Use Default Template to update Email Subject and Body.
- See Default Email Subject & Email Body for more details.
- Click Save.
To deliver route change notifications via email, the customer or site notifications will need to be enabled.

Navigate To: Customers>Customer Explorer>Contacts
- With a contact email address populated at the customer or site level, enable Route Model notification.
- Click Save.
Prior to users accessing Route Modeling features, these programs will need to be enabled in order to become accessible.

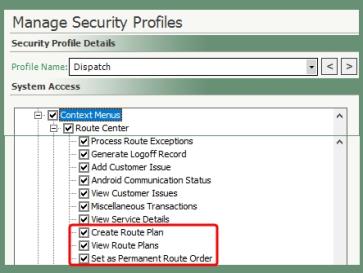
Navigate To: System>Administration>Manage Security Profiles
- Select the applicable Profile Name.
- Expand the System Access tree to Menus/Programs>Routing>Route Modeling and Route Plans.
- Enable or Disable programs as applicable to the selected Profile Name.
- Expand the Context Menu tree to Route Center.
- Enable or Disable Create Route Plan, View Route Plans and Set as Permanent Route Order programs.
Note: Programs and features can be divided between profile names to separate roles and responsibilities.