Zones |
|

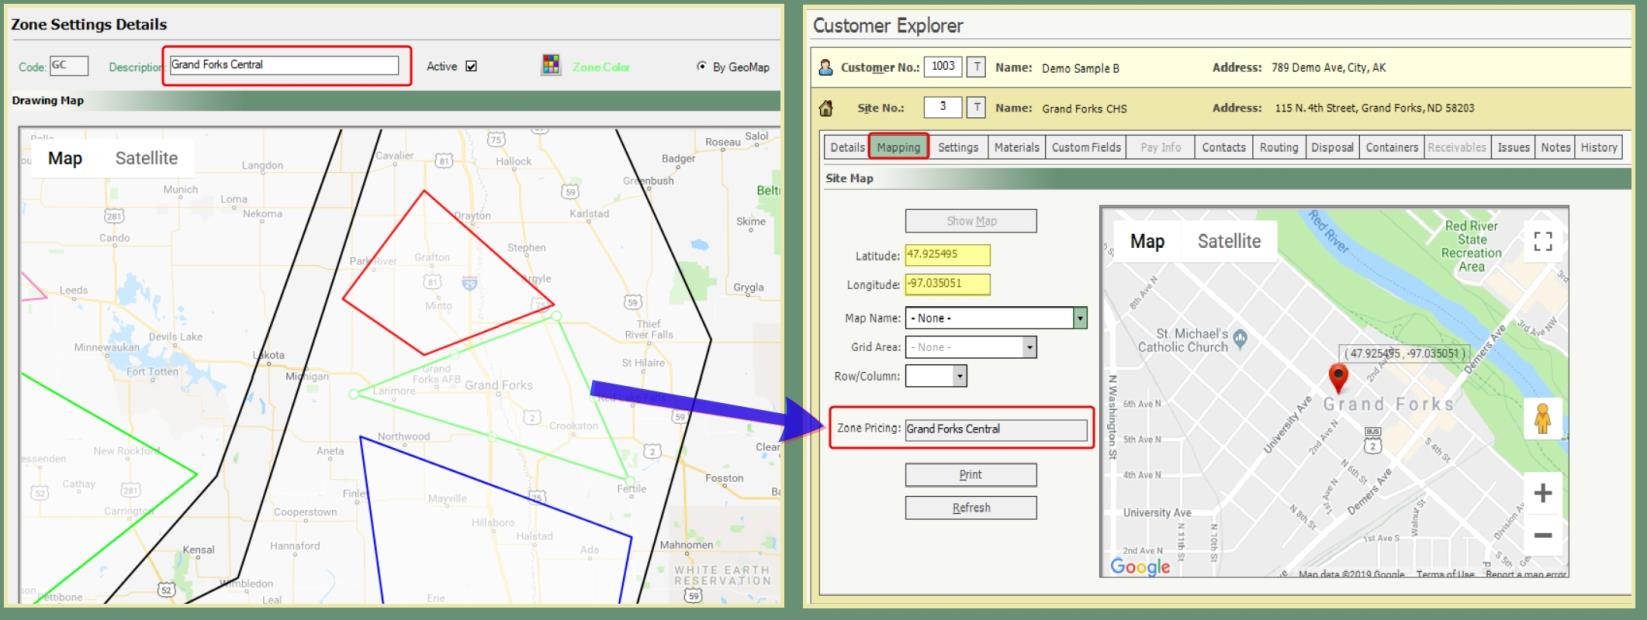
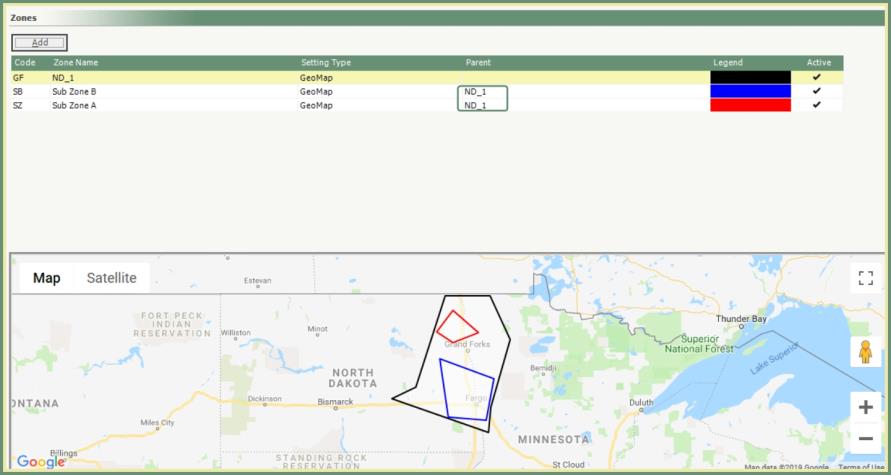
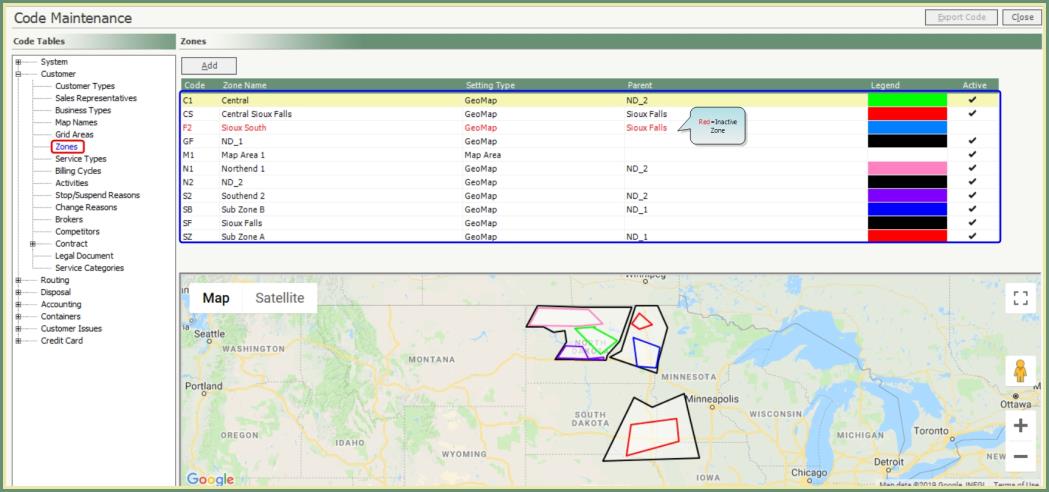
Zones are used to specify a geographic area or sector defined by TRUX users by drawing a polygon shape on a google GeoMap or by linking to a current Map and Area Codes. As many Parent Zone and Service Zones as needed can be created and color coded with optional Site Defaults. Zone Pricing field in Customer Explorer Site Mapping will automatically update. Active and Inactive Zones are represented in the grid by Zone Name, Setting Type, Parent and color Legend. See Requirements and Related Tasks.
- TRUX Version 7.19 or later.
- Licensed Google Mapping.
Navigate To: System>Configuration>Code Maintenance>Customer>Zones
Create the first GeoMap zone for the entire service area first, which will become the Parent Zone. Next, create zones contained within the service area parent zone.

- Click Add.
- Enter a unique two digit code.
- Enter a description.
- Select By GeoMap radio button.
- Click polygon button to draw.
- Draw the full service area.
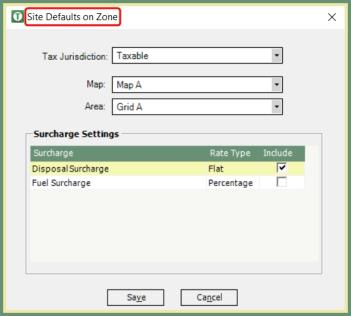
- Click optional Site Defaults
 Site Defaults allow for the site fields to be defaulted.
Site Tax Jurisdiction, Site Map and Area & Site Surcharge Settings.
This will be used when new sites are automatically created using the Online Web Ordering functionality added via web portal.
Site Defaults allow for the site fields to be defaulted.
Site Tax Jurisdiction, Site Map and Area & Site Surcharge Settings.
This will be used when new sites are automatically created using the Online Web Ordering functionality added via web portal.
 .
. - Repeat for all Parent Zones.
- Click Save.
- Click Add.
- Enter a unique two digit code.
- Enter a description.
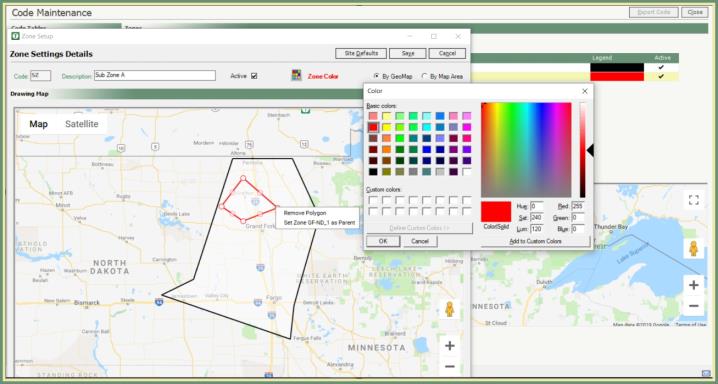
- Click Zone Color.
- Pick a zone color, click ok.
- Select By GeoMap radio button.
- Click polygon button to draw.
- Draw a service area within the existing Parent Zone.
- Click optional Site Defaults Site Defaults allow for the site fields to be defaulted.
Site Tax Jurisdiction, Site Map and Area & Site Surcharge Settings.
This will be used when new sites are automatically created using the Online Web Ordering functionality added via web portal.
.
- Click Save.
- Repeat for each service area within the Parent Zone.
Zones will be added to the grid with associated Parent Zone and Legend Colors.
|
|
Notes:
- Multiple different zones can be created as required. However, zones cannot cross over other zones.
- To modify a zone, double click and the zone area can be changed by moving the polygon and saving.
- To delete a zone, highlight the zone and press the Delete key or right click and select Remove Polygon.
- Click on any column header in the grid to sort the grid.
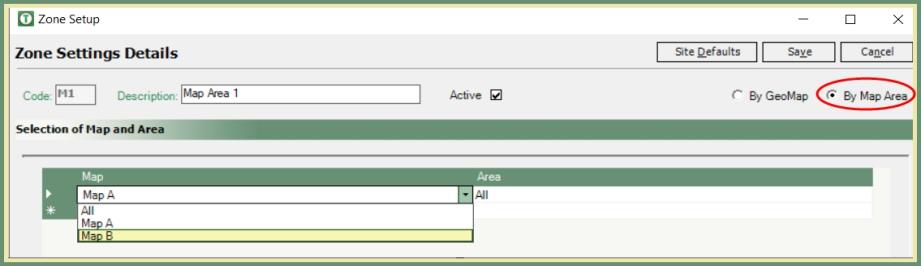
- Click Add.
- Enter a unique two digit code.
- Enter a description.
- Click By Map Area radio button.
- Select existing Map or All maps from drop down.
- Select existing Area or All areas from drop down.
- Set optional Site Defaults.
- Save.
Map Area will be added to the grid as a Map Area Setting Type.
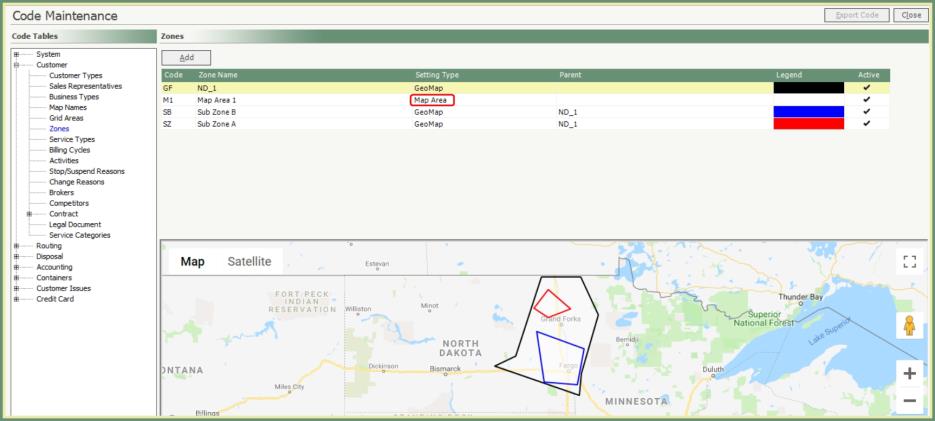
Sites with a latitude and longitude within an existing Zone will automatically update the Zone Pricing field in Customer Explorer Site Mapping.