Customer Notes |
|

The Add/Modify Customer Notes is used to create or modify notes which can be attached to a customer or site and defined by your company specified Customer Note Types. Users can add or modify Customer Notes in a number of locations throughout TRUX. The Customer Note Follow Up is available to view/manage/report on notes created with follow up dates. Also See Related Topics.
Navigate To: System>Administration>Customer Note Types
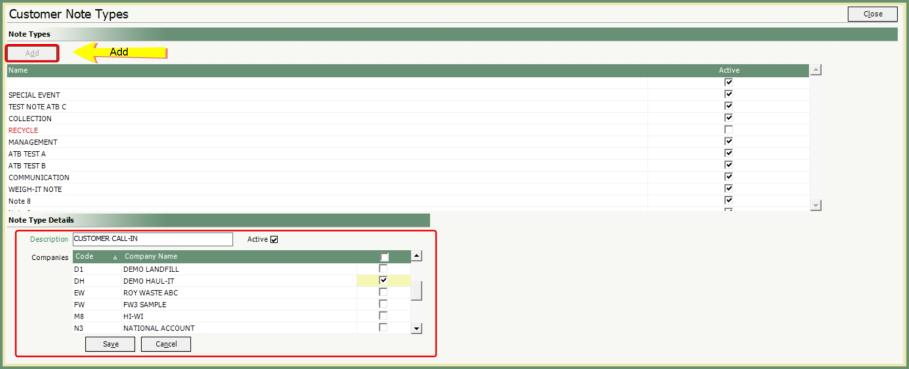
- Click Add.
- Enter Customer Note Type Description in the Note Type Details.
- Select all Companies this Note Type should be available to in the Companies grid.
- Save.
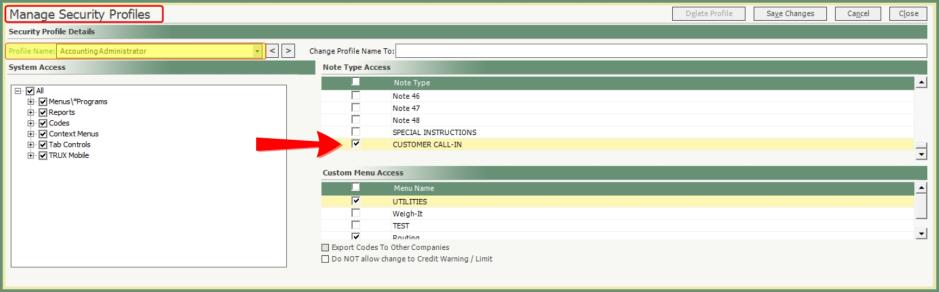
- Add the new Note Type Access to all applicable Security Profiles.
Security Profile
Navigate To: System>Administration>Manage Security Profiles
- Enter Customer/Site Notes must be enabled in User Details for users to create notes.
Manage Users
Navigate To: System>Administration>Manage Users
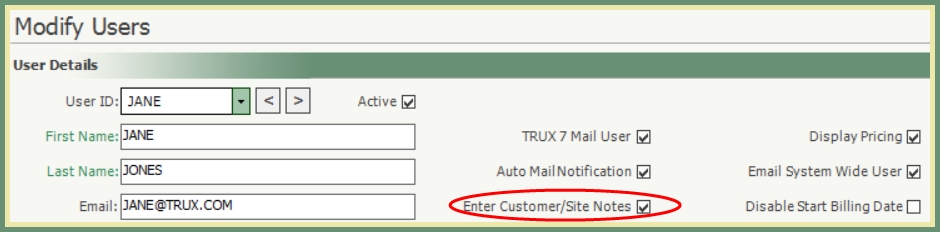
-
Enable Customer/Site Notes to allow users to view notes.
Customer Notes is accessible from the following locations throughout TRUX:
- Homepage>Customer/Site Notes link
- Search Results>Right Click>Display Notes
- Customer Explorer>Customer or Site Notes Tab
- Account Inquiry>Customer Notes button
- Route Center>Unscheduled/Scheduled/Completed Call>Right Click>Customer/Site Notes
- Dispatch>Highlight Unassigned/Assigned Call>Notes button
- Dispatch>Highlight Unassigned/Assigned Call>Right Click>Notes
- Services To Be Routed>Right Click>Customer/Site Notes
- Customer Issue>Notes
Existing Notes for this Customer will populate the grid. Select an existing note from the grid to view or modify.
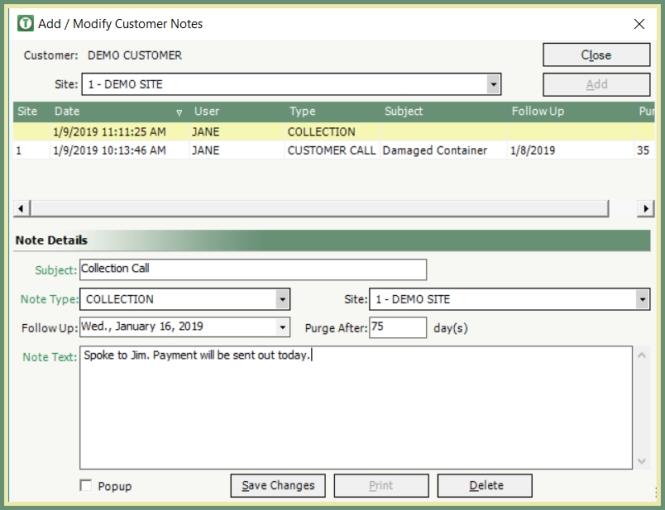
- To apply a new note to specific site, select the site from the Site dropdown.
- Click Add.
- Fields in green are required.
- Enter a note Subject.
- Select a Note Type.
- Follow Up date selection will appear on the homepage on the follow up date.
- Purge After days will remove the note after the number of days entered, following the next purge.
- Enter a Note Text.
- If the Popup box is checked, this note will popup when accessing the customer via scheduled calls, customer explorer, etc...
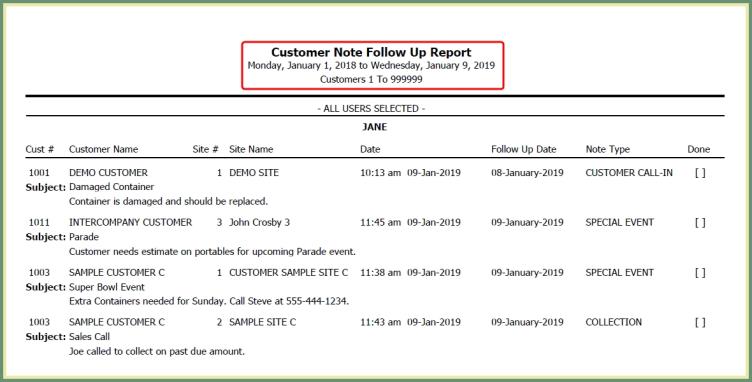
Navigate To: Report>Report Center>Customer>Customer Note Follow Up Listing

- Select Date Range.
- Select All or Specific Users.
- Customer range will default to all or can be specified.
- Customer Type -All- or specific.
- Select Note Types to be reported.
- Click Refresh to populate the grid.
- Select an Output to generate a report.
- To Delete a note, highlight a note in the grid and click Delete.
- To Purge notes that have met their purge days, click Purge.
