Container Maintenance |
|

Container tracking can be maintained through Container Inventory and allows you to Add New, Assign, Modify and View Existing Containers and Container History. Before you begin your container inventory entry, start with the Preceding Code Setup. Also see Related Topics.
Navigate To: System>Configuration>Code Maintenance>Containers
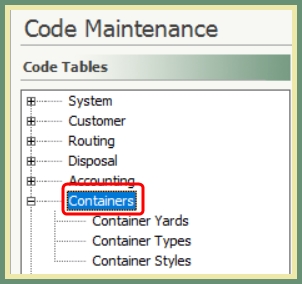
Container Yards
- Locations where container inventory can be stored.
- Types of Containers : Front Load, Roll Off, Rear Load, Cart etc.
- Associate applicable service types for each container type.
- Inventory:

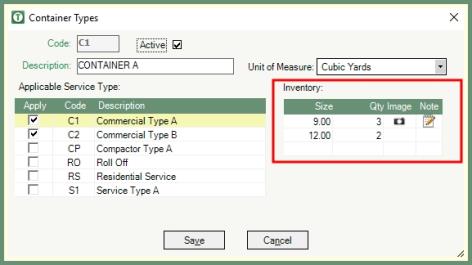 Add container inventory by Size & Quantity with optional Images & Notes.
Container Styles
- Styles of Containers: Slant, Straight, High Back, Low Back etc.
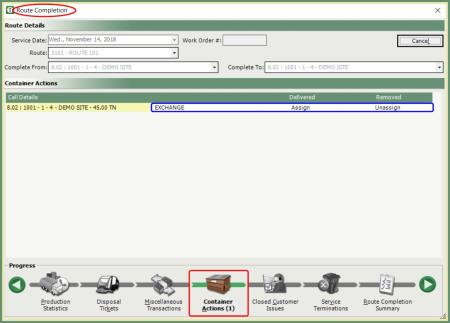
When the Activity with an Inventory Action setting is on a route, route completion will indicate there is a Container Action(s) to Assign, Unassign or Both (Exchange) based on the Inventory Action setting.
Navigate To: System>Configuration>Code Maintenance>Customer>Activities
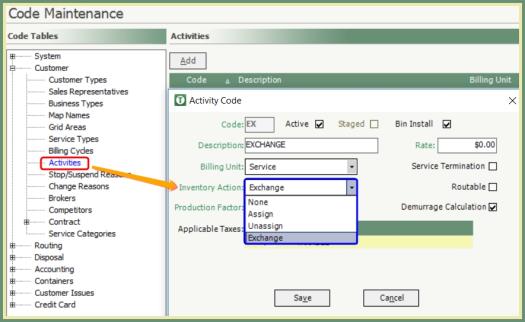
Inventory Action Examples:
Assign - Delivery activity will prompt the user to assign a container before the call can be completed.
Unassign - Removal activity will prompt the user to unassign the container before the call can be completed.
Exchange - Swap out or Exchange activity will prompt the user to assign and unassign a container before the call can be completed.
Navigate To: Customers>Container Inventory

- Click Add New
- Fields in green are required fields. Fields in black are optional.
- Enter a unique container number.
- Select a Container Type from the drop down.
- Enter a Size and Unit of Measure.
- Select a Container Yard.
- Populate fields in black as needed.
- Click Images to attach an image of the container.
- Save.
Assign Container from Add Container
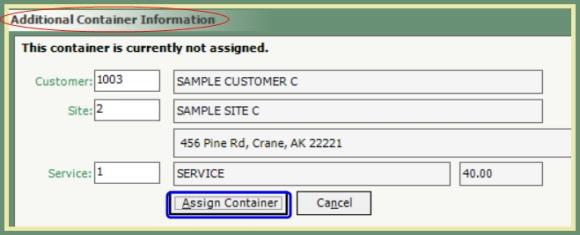
Once the new container is saved, it can be assigned to a customer service from the bottom section of the screen; Additional Container Information.
- Manually enter or click search to select the Customer-Site-Service to assign the container.
- The customer service must be a service type applicable to the container type being assigned.
- Click Assign Container.
Navigate To: Customers>Container Inventory
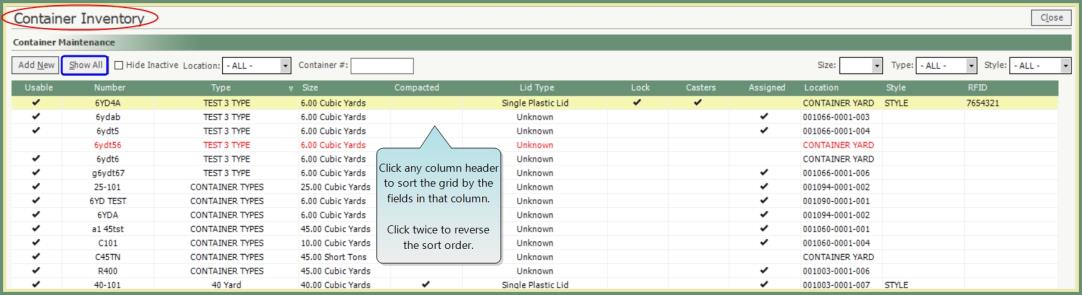
- The screen will appear blank until an action is taken.
- Click Show All to view all active and inactive containers and container details.
- Containers or fields in red are inactive.
- Double click on a container in the grid to view or modify in the Modify Container screen.
- Click Print Container Inventory Report in the lower left corner of the screen to print the container inventory list.
Grid Sorting Options
- Click any column header to sort by the fields in that column.
- Select Hide Inactive to remove inactive containers from the grid.
- Location drop down will sort the grid by containers by all or specified location (Container Yard or On Truck).
- Enter Container # to view a specific container.
- Size, Type and Style drop down will sort the grid by containers that meet the selections specified.
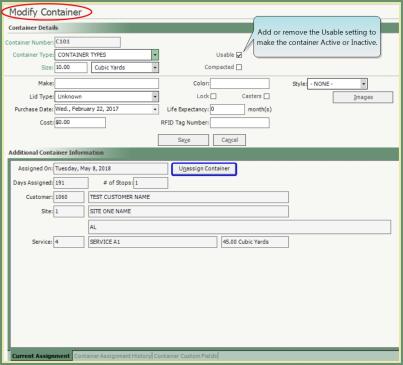
- Double click on a container in the container maintenance grid to view or modify in the Modify Container screen.
- Add or remove the Usable setting to make the container Active or Inactive.
- Modify fields as needed; Save.
- If the container is currently assigned, the Current Assignment details will be displayed.
- Click Unassign Container to unassign from the current customer service.
- To assign the container, enter or search and select customer service to assign the container to.
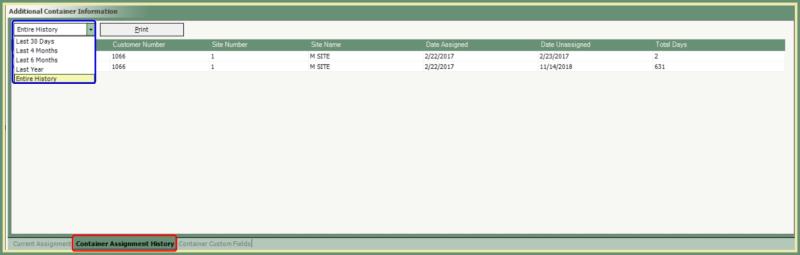
- Click Container Assignment History to view the history of this containers assignments, unassignments, dates, etc...
- Click the drop down to view Entire History or Last (30 Days, 4 months, 6 months, Year).
- Click Print to print the container history.