Email Notification Settings
Email Notifications can be setup to send a Default or Customized subject and body on emailed invoices, statements, overdue letters, online payment receipts, disposal tickets, work orders, price increases and route modeling notification letters for customers with active Contact notifications. Also See Email Samples and Related Topics.
Navigate To: System>Configuration>Notification Settings
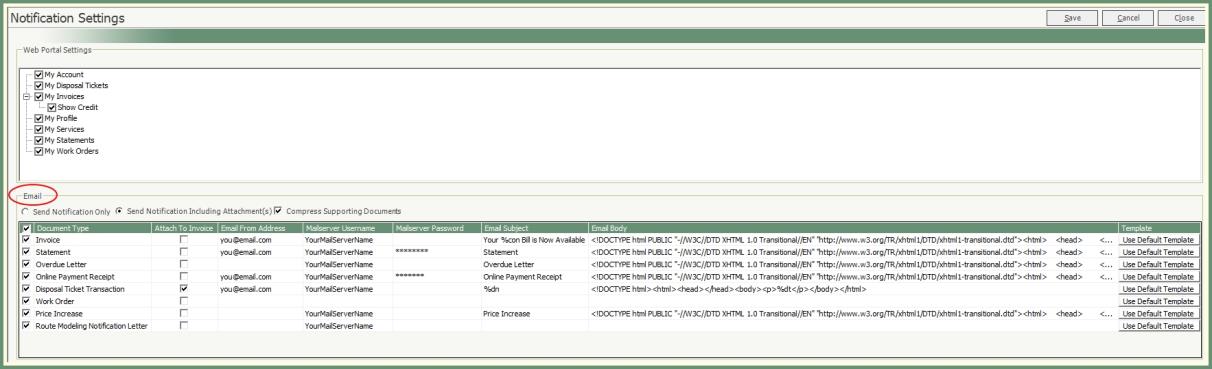
- In the Email section, select to Send Notification Only
 or Send Notification Including Attachment(s)
- If Send Notification Including Attachment(s) is selected, the option to Compress Supporting Documents is available. This option will compress the attachments when multiple documents such as disposal tickets, work orders, statements, etc... are sent.
- Select a Document Type by placing a check mark in the box.
- Select Attach To Invoice to include the selected Document Type to an emailed Invoice.
- Enter the Email from Address. This is the email address the email notification will be sent From.
- Enter the Mailserver Username and Password.
- Email address, mailserver username & password may need to be obtained from your IT Systems Administrator.
- Populate Email Subject and Email Body with Default Template or Customized Email Setup.
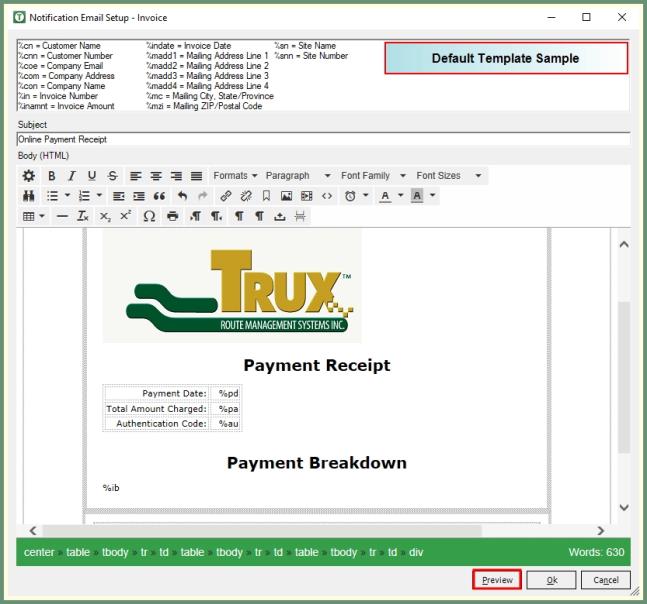
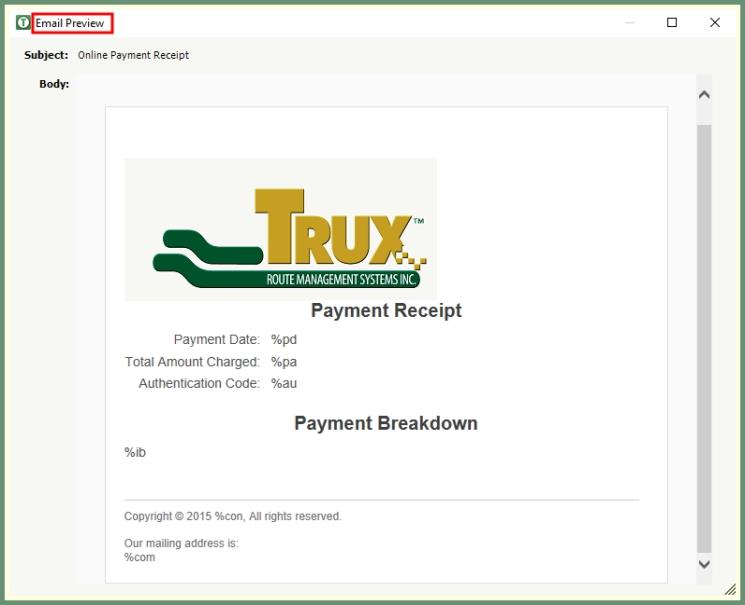
Default Email Subject & Email Body
Default Template contains pre-defined Email Subject & Email Body fields for each document type.

- Click Use Default Template.
- Email Subject and Email Body will populate with the pre-defined fields contained in the Default Template.
- Click in the Email Subject or Email Body to open the Notification Email Setup.
- Click Preview to view a sample document.
- Default Subject & Body fields can be edited as needed.
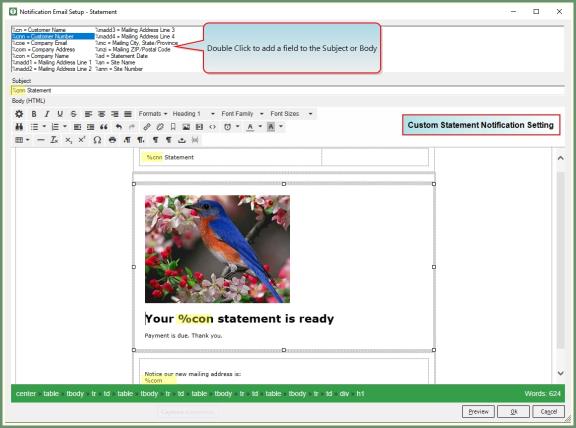
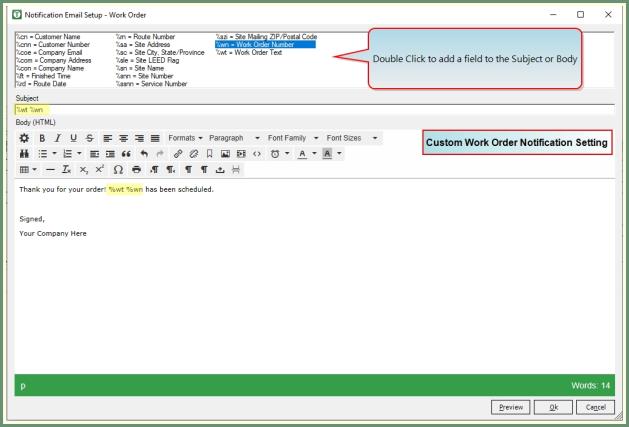
Customized Email Subject & Email Body
Email Subject and Email Body can be customized per your company preferences with specified fields, images, text, etc... using the provided HTML editor.

- Click in the Email Subject or Email Body to open the Notification Email Setup.
- Click in the Subject line to edit the existing text and/or double click to select a field to insert into the Subject.
- Click in the Body to add, remove or edit text, images, etc... to the email Body HTML.
- Double click to add a related field from the field selections to the Body.
- Click Preview to view a sample email.
- Click Ok to save and close the Notification Email Setup.
In order for a customer or site to receive an emailed document, the notification settings must be active in the customer or site contacts along with a valid email address.
Navigate To: Customers>Customer Explorer>Contacts

- From the Customer and/or Site Contacts, verify or add a Customer Contact First Name, Last Name and Email Address.
- Select each Document Type to allow TRUX to email by placing a check mark in the box's below each to be applied to this Customer or Site.
- Document Types left unchecked will not be emailed to this Customer or Site.
- Save.
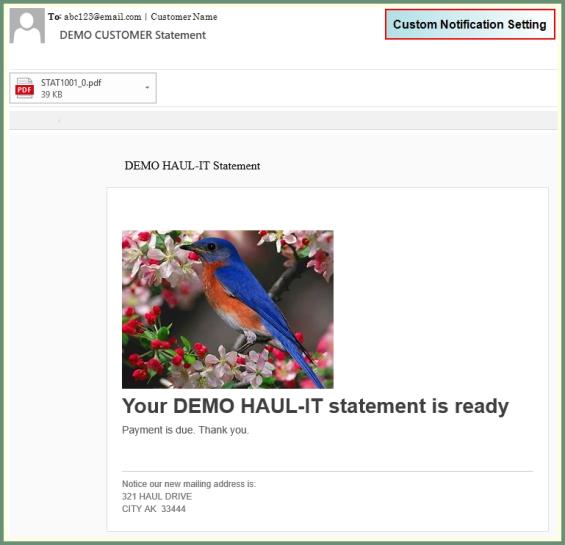
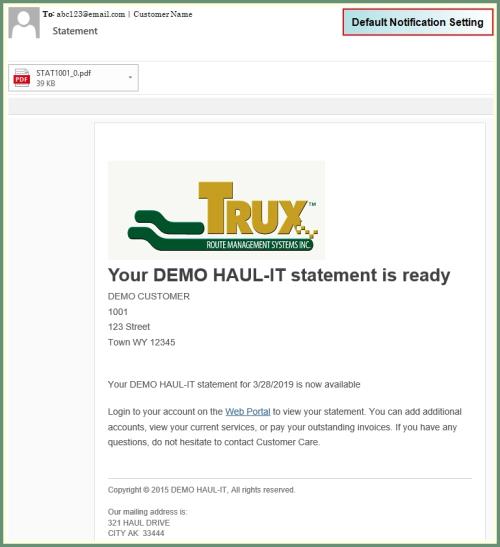
Email Statement Notification Samples