Announcements |
|

Announcement Center will give users the ability to create announcements based on specified criteria in Customer Subset Maintenance and delivered through email, web portal or both. Also see Related Topics.
Enable Email Announcements must be selected in Notification Settings and Customer Explorer in order for announcements to be emailed to customers.
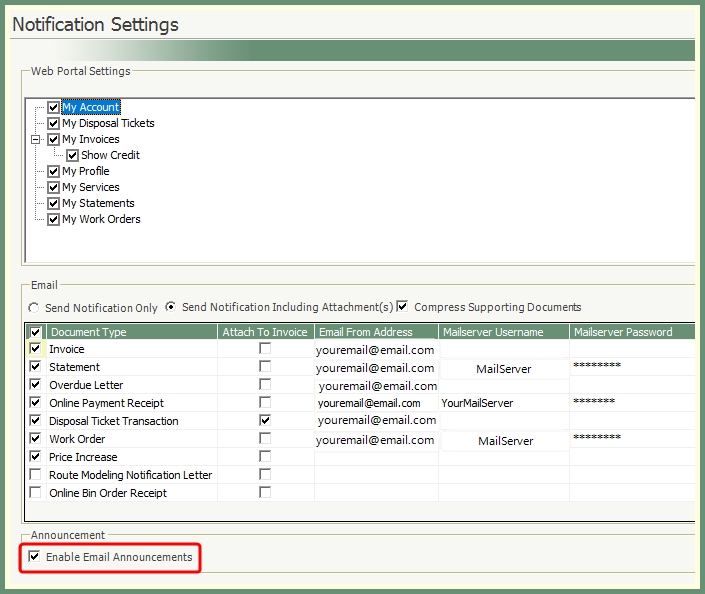
Navigate To: System>Configuration>Notification Settings
- Select Enable Email Announcements.
- Save.
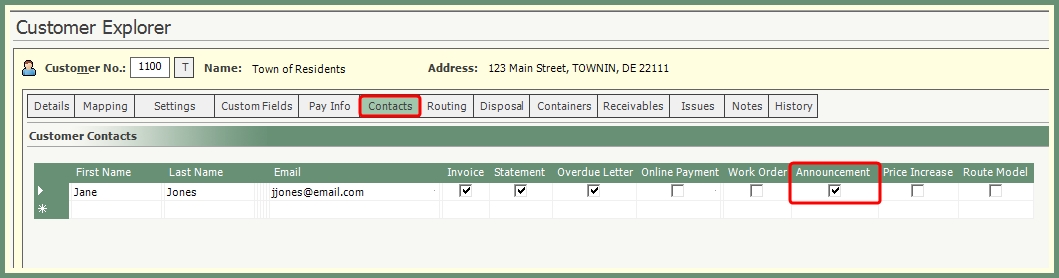
- Proceed to Customer Explorer>Customer or Site>Contacts.
- The customer or site must have an email address.
- Select Announcement.
- Save.
- Repeat for each customer to potentially receive an announcement.
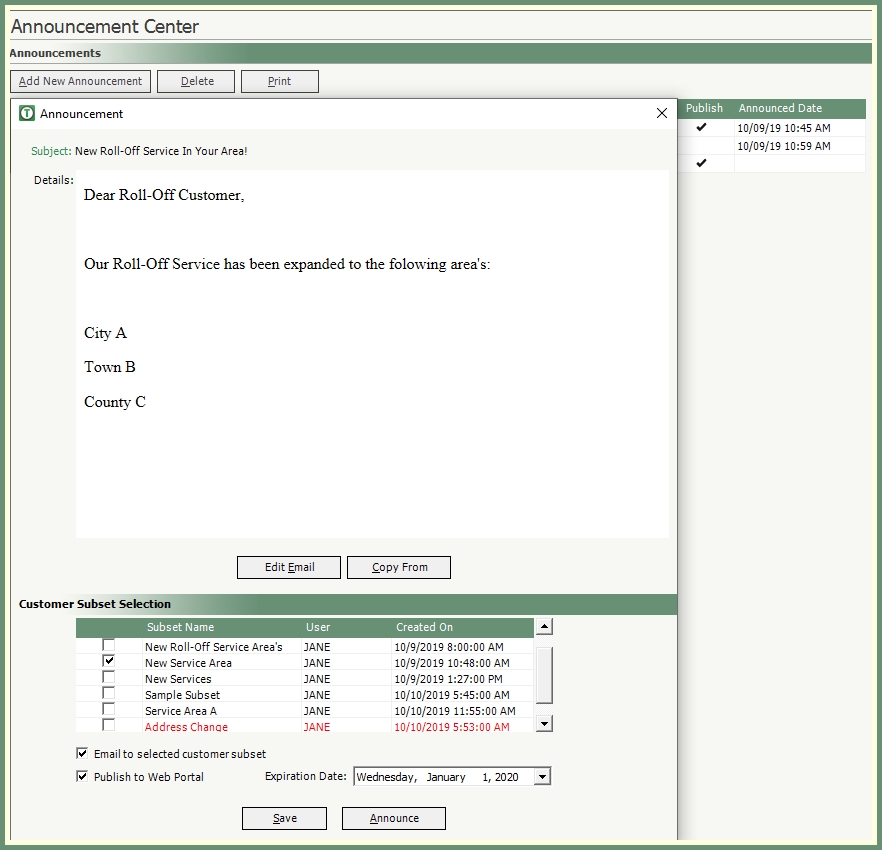
Navigate To: Utility>Announcement Center
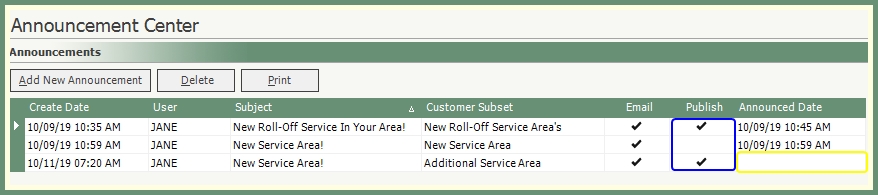
- Existing Announcements will populate the grid.
- Sort the grid by any column header.
- Print button will print the details of each Announcement in the grid.
- The Email column indicates the announcement is emailed to the customers.
- The Publish column indicates the announcement is published to the web portal.
- Announce Date column indicates the date and time the announcement was sent. If this field is blank, the announcement has been created but not yet distributed.
- Announcements that have been executed cannot be modified. Double click to view as ready only.
- Announcements that have not been executed can be modified. Double click to open and make changes.
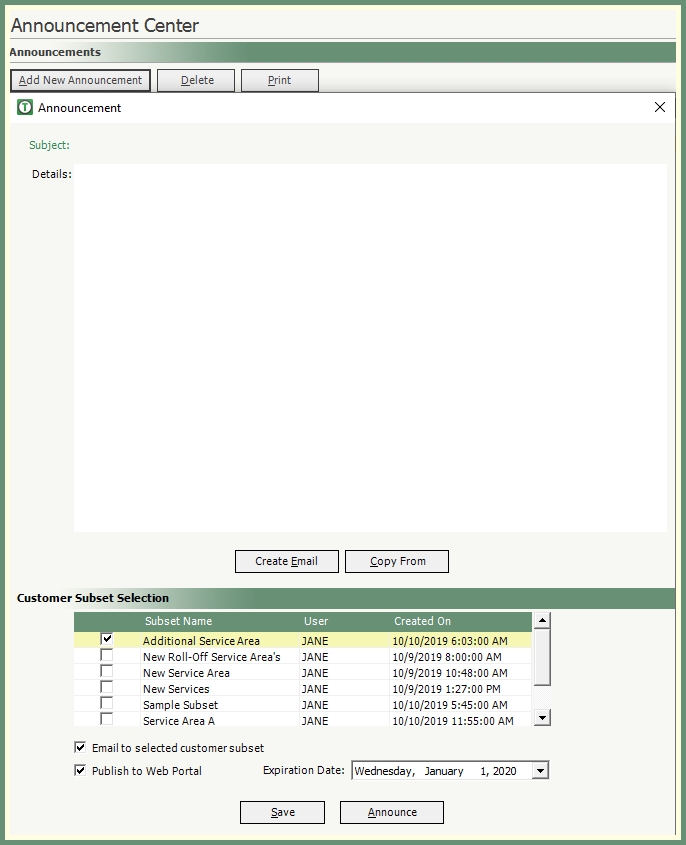
- Click Add New Announcement.
- Select the Customer Subset(s) to associate with this announcement.
- The Subject and Details will be blank until an email is created or copied from an existing announcement.
- Select Email to selected customer subset to deliver this announcement via email.
- Select Publish to Web Portal to display this announcement when users log into the web portal.
- Select the Expiration Date to end the published web portal announcement.
- Both Email and Web Portal can be selected.
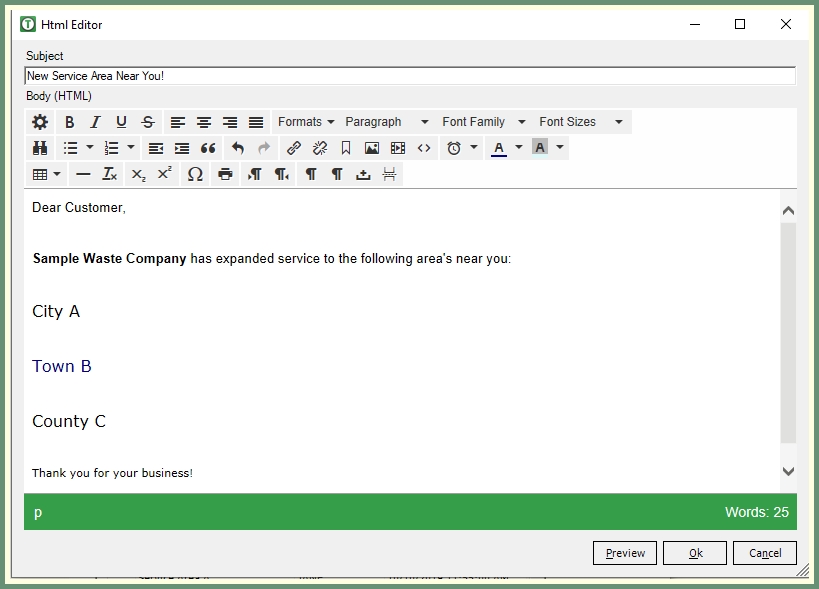
- Enter Subject.
- Populate the body of the email with text, links, images, video's, etc...
- Use the HTML tools to alter fonts, colors, add links, tables, and more.
- Click Preview to view the email.
- Click Ok when finished.
- Click Save.
- The new announcement will be added to the Announcements grid.
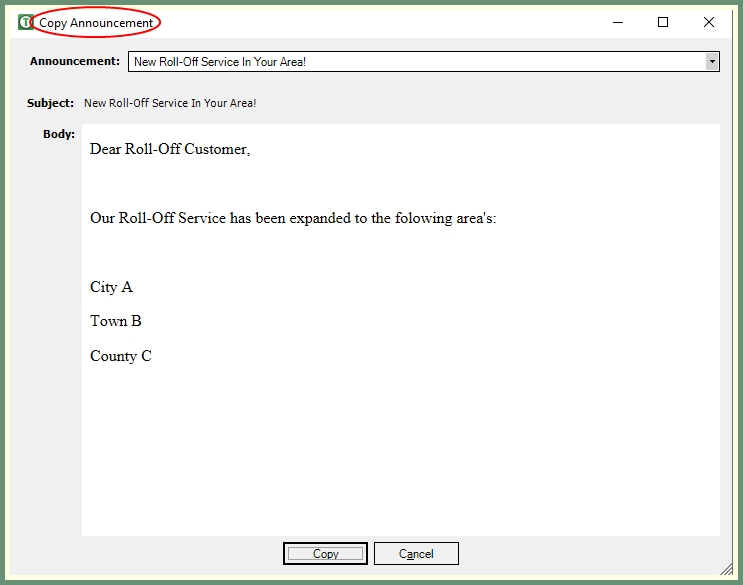
- Click Add New Announcement.
- Click Copy From.
- From the Announcement drop down, select the announcement to copy from.
- The email from the copied announcement will populate the Subject and Body.
- Modify as needed.
- Click Copy.
Announcements that have not been executed can be deleted.
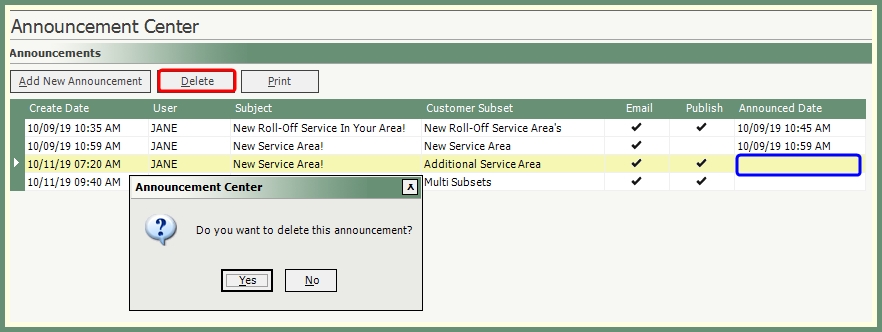
- Select an Announcement from the grid with a blank announced date.
- If an announcement has been executed, the Announce Date will be populated and cannot be deleted.
- Click Delete.
- Confirm delete announcement message.
- The deleted Announcement will be removed from the grid.
- Recall an existing Announcement that has not yet been executed.
- Review the Announcement email, subsets and settings.
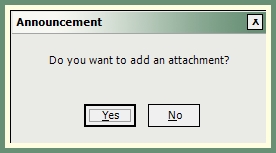
- Click Announce.
- Review Announcement message, confirm to continue.

- Attachment option will be prompted. Click Yes to browse and add an attachment or Click No to skip.
- The Announcement Date field will be populated in the grid and the Announcement will be emailed and/or published as per parameters.